Instant Pot Mississippi Meatballs: Easy and Flavorful Recipe!

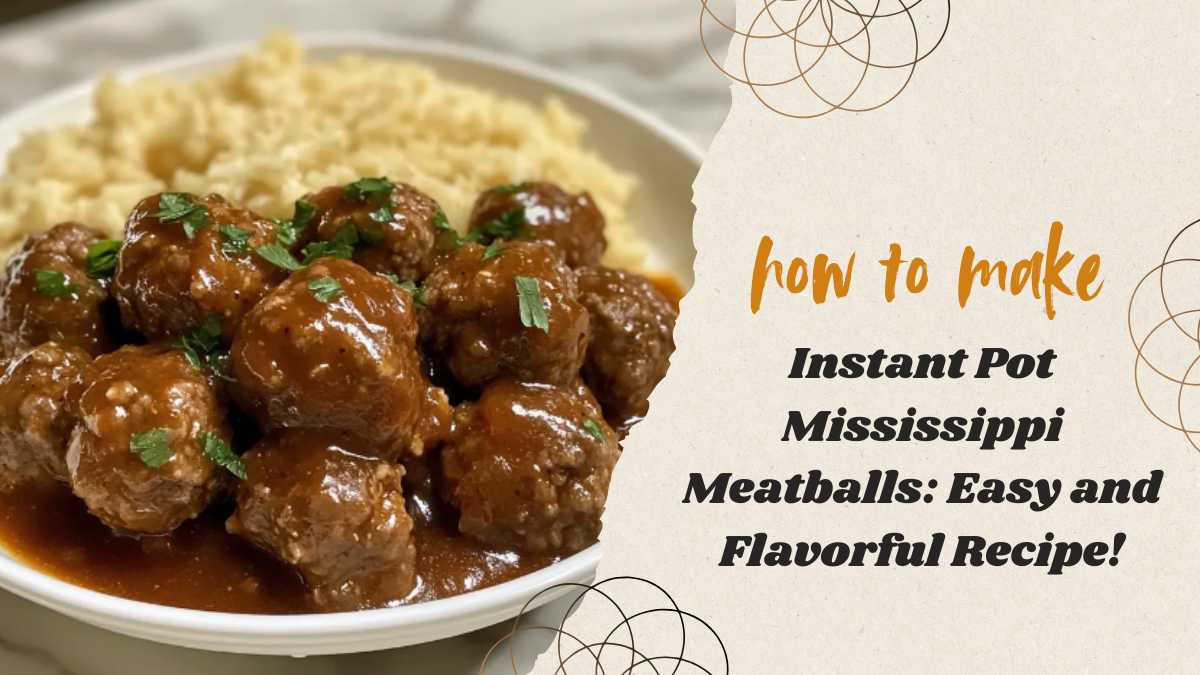
Mississippi Meatballs are a delicious twist on the classic Mississippi pot roast, featuring a rich, tangy, and savory flavor that makes them irresistible. With the Instant Pot, you can enjoy this mouthwatering dish in a fraction of the time. Whether you’re making them as an appetizer, main dish, or party snack, these Instant Pot Mississippi Meatballs will become your new favorite go-to recipe.

Why You’ll Love This Recipe

  • Quick & Easy – Using an Instant Pot speeds up the cooking process significantly.
  • Rich Flavor – A perfect balance of buttery, tangy, and savory flavors.
  • Versatile – Serve as a meal with mashed potatoes or as an appetizer with toothpicks.
  • Family Favorite – Loved by kids and adults alike!

Ingredients You’ll Need

To make the best Mississippi Meatballs, you’ll need the following ingredients:

For the Meatballs:

  • 1 lb ground beef
  • ½ cup breadcrumbs
  • 1 large egg
  • 2 cloves garlic, minced
  • ¼ cup grated Parmesan cheese
  • ½ tsp onion powder
  • ½ tsp black pepper
  • ½ tsp salt
  • 1 tbsp Worcestershire sauce
  • 2 tbsp milk

For the Mississippi Sauce:

  • 1 packet ranch seasoning mix
  • 1 packet au jus gravy mix
  • ½ cup unsalted butter, sliced
  • ½ cup beef broth
  • 6-8 pepperoncini peppers (plus extra for garnish)
  • 1 tbsp pepperoncini juice

How to Make Instant Pot Mississippi Meatballs

Step 1: Prepare the Meatballs

  1. In a large bowl, combine ground beef, breadcrumbs, egg, garlic, Parmesan cheese, onion powder, salt, and black pepper.
  2. Add in Worcestershire sauce and milk, then mix everything together until well combined.
  3. Roll the mixture into 1-inch meatballs and set aside.

Step 2: Sauté the Meatballs in the Instant Pot

  1. Turn the Instant Pot to “Sauté” mode and add a drizzle of oil.
  2. Once hot, add the meatballs in batches and cook until browned on all sides (about 2-3 minutes per batch).
  3. Remove the meatballs and set aside.

Step 3: Prepare the Mississippi Sauce

  1. Pour beef broth into the Instant Pot to deglaze the bottom, scraping up any browned bits.
  2. Add ranch seasoning mix, au jus mix, butter slices, pepperoncini peppers, and pepperoncini juice.
  3. Stir gently to combine the ingredients.

Step 4: Pressure Cook the Meatballs

  1. Place the browned meatballs into the Instant Pot, making sure they are submerged in the sauce.
  2. Secure the lid, set the valve to Sealing, and select Manual/Pressure Cook for 7 minutes.
  3. Once done, allow a natural release for 5 minutes, then do a quick release.

Step 5: Serve and Enjoy!

  1. Remove the meatballs from the Instant Pot and drizzle them with the rich sauce.
  2. Serve hot as a main dish with mashed potatoes, rice, or noodles.
  3. For appetizers, serve with toothpicks and extra pepperoncini on the side.

Tips for the Best Mississippi Meatballs

  • Use Lean Ground Beef – This prevents excessive grease in the Instant Pot.
  • Don’t Overmix – Overworking the meatball mixture can make them dense.
  • Brown the Meatballs First – Sautéing locks in flavor and helps them hold together.
  • Adjust the Heat – If you like spicier meatballs, add extra pepperoncini juice or crushed red pepper flakes.

What to Serve with Mississippi Meatballs

Looking for the perfect sides? Try pairing these tender meatballs with:

  • Creamy Mashed Potatoes – A classic combo that soaks up the sauce.
  • Buttered Noodles – A simple, delicious side.
  • Steamed Vegetables – Green beans, broccoli, or carrots complement the rich flavors.
  • Rice – Fluffy white or brown rice balances the tangy sauce.

How to Store and Reheat Mississippi Meatballs

Storing Leftovers:

  • Refrigerator: Store in an airtight container for up to 4 days.
  • Freezer: Freeze in a sealed container for up to 3 months.

Reheating Tips:

  • Microwave: Heat in 30-second intervals until warm.
  • Stovetop: Simmer in a small saucepan over medium heat for 5-7 minutes.
  • Instant Pot: Use the “Sauté” mode to warm them up gently.

FAQs About Mississippi Meatballs

1. Can I use frozen meatballs instead of homemade?

Yes! If using frozen meatballs, skip the browning step and pressure cook for 10 minutes instead of 7.

2. Can I make this in a slow cooker instead of an Instant Pot?

Absolutely! Brown the meatballs first, then cook on low for 4-6 hours or high for 2-3 hours.

3. Can I make this recipe keto-friendly?

Yes! Simply swap breadcrumbs for almond flour and ensure your ranch seasoning mix is low-carb.


Final Thoughts

These Instant Pot Mississippi Meatballs are a game-changer! With minimal prep and a powerhouse of flavor, they are perfect for family dinners, meal prep, or party appetizers. Try them today and let your taste buds dance with delight!

Delicious Greek Meatballs: A Flavorful Recipe You’ll Love!

Greek cuisine is renowned for its rich flavors, aromatic herbs, and deliciously satisfying dishes. One such delight is Greek meatballs, also known as Keftedes. These savory, juicy meatballs are infused with Mediterranean spices, making them an irresistible addition to any meal. Whether served as an appetizer, main dish, or part of a mezze platter, this Greek meatball recipe is sure to impress!

Why You’ll Love These Greek Meatballs

  • Packed with Flavor – A blend of garlic, oregano, and mint enhances the rich, juicy texture.
  • Versatile – Serve them as a snack, with pita, or over a Greek salad.
  • Easy to Make – With simple ingredients and quick preparation, this is a stress-free recipe.
  • Perfect for Meal Prep – Store them in the fridge or freezer for a quick and tasty meal anytime!

Ingredients for Authentic Greek Meatballs

To make these delicious Greek Keftedes, you’ll need:

Meat Mixture:

  • 1 lb (450g) ground beef (or lamb for extra authenticity)
  • 1/2 lb (225g) ground pork (adds juiciness)
  • 1 small onion, grated
  • 2 cloves garlic, minced
  • 1/3 cup fresh parsley, chopped
  • 1 tbsp dried oregano
  • 1 tbsp fresh mint, chopped (or 1 tsp dried mint)
  • 1 tsp ground cumin
  • 1/2 tsp cinnamon (optional, for depth of flavor)
  • Salt and black pepper, to taste
  • 1 egg (helps bind the mixture)
  • 1/2 cup breadcrumbs
  • 2 tbsp milk (for tenderness)
  • 2 tbsp olive oil

For Frying:

  • 1/2 cup flour (for dredging)
  • Vegetable oil (for frying)

Serving Suggestions:

  • Greek yogurt or tzatziki sauce
  • Lemon wedges
  • Warm pita bread
  • Greek salad or rice pilaf

Step-by-Step Guide to Making Greek Meatballs

1. Prepare the Meat Mixture

In a large mixing bowl, combine the ground beef and pork. Add the grated onion, minced garlic, parsley, oregano, mint, cumin, cinnamon (if using), salt, and pepper. Mix thoroughly.

2. Bind the Ingredients

Beat the egg and mix it into the meat mixture. Add breadcrumbs, milk, and olive oil. Using your hands, knead everything together until well combined. The mixture should be slightly sticky but firm. Cover and refrigerate for 30 minutes to help the flavors meld and the mixture firm up.

3. Shape the Meatballs

Take small portions of the mixture and roll them into evenly-sized balls (about 1 to 1.5 inches in diameter). Lightly dust each meatball with flour to help create a crispy crust when frying.

4. Fry the Meatballs

Heat a generous amount of vegetable oil in a deep pan over medium heat. Once hot, fry the meatballs in batches, turning occasionally, until golden brown and fully cooked (about 6-8 minutes per batch). Remove and drain on paper towels.

5. Serve and Enjoy

Arrange the keftedes on a platter, garnish with fresh parsley, and serve with a side of tzatziki, lemon wedges, and warm pita bread. Enjoy these flavorful Greek meatballs as part of a mezze spread or as a hearty main dish!


Baking Option (Healthier Alternative)

For a lighter version, you can bake the meatballs instead of frying:

  1. Preheat the oven to 400°F (200°C).
  2. Line a baking sheet with parchment paper and lightly grease it.
  3. Arrange the meatballs on the sheet and bake for 20-25 minutes, turning halfway through, until golden brown and cooked through.

Tips for the Best Greek Meatballs

  • Use Fresh Herbs – Fresh mint and parsley add authentic Greek flavors.
  • Grate the Onion – This ensures moisture and even distribution of flavor.
  • Chill the Mixture – Letting it rest makes it easier to shape and enhances taste.
  • Don’t Overwork the Meat – Gently mix for a tender texture.
  • Serve with Tzatziki – This cool, garlicky yogurt sauce perfectly complements the keftedes.

What to Serve with Greek Meatballs

Greek meatballs are incredibly versatile and pair well with many Mediterranean dishes:

  • Tzatziki Sauce – A creamy yogurt-based dip with cucumber and garlic.
  • Hummus and Pita – Classic Greek accompaniments.
  • Greek Salad – A fresh mix of tomatoes, cucumbers, olives, and feta cheese.
  • Lemon Rice Pilaf – A zesty, fluffy side dish.
  • Roasted Vegetables – Bell peppers, zucchini, and eggplant make a perfect pairing.

How to Store and Reheat Greek Meatballs

Refrigeration:

  • Store cooled meatballs in an airtight container for up to 4 days.
  • Reheat in a pan over medium heat or in the oven at 350°F (175°C) for 10 minutes.

Freezing:

  • Freeze uncooked or cooked meatballs for up to 3 months.
  • To cook from frozen, bake at 375°F (190°C) for 25-30 minutes.

Final Thoughts

These delicious Greek meatballs are the perfect dish for any occasion! Whether served as an appetizer, a main course, or part of a mezze platter, they’re guaranteed to bring Mediterranean flavor to your table. Try this recipe today and enjoy the authentic taste of Greece!

Marry Me Shrimp Pasta: Irresistible Creamy Delight!

A Decadent and Flavorful Seafood Pasta Recipe

If you are looking for an elegant yet easy-to-make pasta dish, then look no further than this Marry Me Shrimp Pasta. This creamy, savory, and slightly spicy pasta is the perfect combination of flavors that will make anyone fall in love at first bite. The succulent shrimp, rich creamy sauce, and perfectly cooked pasta come together in a dish that is both restaurant-worthy and simple enough to make at home.


Why You Will Love This Recipe

  • Quick and Easy – Ready in just 30 minutes, perfect for busy weeknights.
  • Rich and Creamy – A luxuriously smooth sauce made with heavy cream and Parmesan.
  • Savory with a Kick – A blend of garlic, sun-dried tomatoes, and red pepper flakes gives it an irresistible depth of flavor.
  • Versatile – Pair it with your favorite pasta type or add extra vegetables for a personal touch.
  • Date-Night Approved – The perfect meal to impress someone special!

Ingredients for Marry Me Shrimp Pasta

To make this delicious shrimp pasta dish, you will need the following fresh and flavorful ingredients:

For the Shrimp:

  • 1 lb large shrimp, peeled and deveined
  • 1 tsp salt
  • ½ tsp black pepper
  • ½ tsp red pepper flakes (adjust to taste)
  • 1 tbsp olive oil
  • 1 tbsp unsalted butter
  • 4 cloves garlic, minced

For the Sauce:

  • ½ cup sun-dried tomatoes, chopped
  • 1 cup heavy cream
  • ½ cup chicken broth (or white wine for extra flavor)
  • ½ cup Parmesan cheese, grated
  • 1 tsp Italian seasoning
  • ½ tsp paprika
  • ½ tsp red pepper flakes (optional for extra heat)

For the Pasta:

  • 12 oz fettuccine (or your favorite pasta)
  • 2 tbsp fresh basil, chopped
  • 1 tbsp fresh parsley, chopped

Step-by-Step Instructions

Step 1: Cook the Pasta

  1. Bring a large pot of salted water to a boil.
  2. Cook the pasta according to the package instructions until al dente.
  3. Reserve ½ cup of pasta water before draining. Set aside.

Step 2: Sauté the Shrimp

  1. In a large skillet, heat olive oil and butter over medium heat.
  2. Add seasoned shrimp and cook for 1-2 minutes per side until they turn pink and opaque.
  3. Remove the shrimp from the skillet and set aside.

Step 3: Prepare the Sauce

  1. In the same skillet, add garlic and cook until fragrant.
  2. Stir in sun-dried tomatoes and cook for another 1-2 minutes.
  3. Pour in chicken broth (or wine) and scrape up any browned bits from the bottom of the skillet.
  4. Lower the heat and add heavy cream, Parmesan cheese, Italian seasoning, paprika, and red pepper flakes.
  5. Stir continuously until the sauce thickens, about 3-5 minutes.

Step 4: Combine Everything

  1. Add the shrimp back into the skillet and stir to coat in the sauce.
  2. Toss in the cooked pasta and mix well.
  3. If the sauce is too thick, add a bit of the reserved pasta water to achieve the desired consistency.
  4. Garnish with fresh basil and parsley.

Step 5: Serve and Enjoy!

  1. Serve the Marry Me Shrimp Pasta warm, with extra Parmesan cheese and red pepper flakes on top.
  2. Pair with a side of garlic bread or a fresh green salad for a complete meal.

Tips for the Best Marry Me Shrimp Pasta

  • Use Fresh Shrimp – The fresher the shrimp, the better the flavor.
  • Don’t Overcook the Shrimp – Cook them just until pink to keep them tender and juicy.
  • Adjust the Spice Level – Add more or less red pepper flakes based on your preference.
  • Choose the Right PastaFettuccine, linguine, or penne work best to hold the creamy sauce.
  • Make It Healthier – Swap heavy cream for half-and-half or use zucchini noodles instead of pasta.

Variations and Additions

Want to customize your dish? Here are some great variations:

  • Add Vegetables – Try spinach, mushrooms, or cherry tomatoes for added nutrition.
  • Make it Extra Cheesy – Stir in mozzarella cheese for a richer, cheesier sauce.
  • Switch Up the Protein – Use chicken, scallops, or lobster instead of shrimp.
  • Gluten-Free Option – Use gluten-free pasta or zoodles (zucchini noodles).

What to Serve with Marry Me Shrimp Pasta

This rich and flavorful pasta dish pairs perfectly with:

  • Crusty Garlic Bread – Soak up the delicious sauce.
  • Caesar Salad – A light and refreshing contrast.
  • Steamed Asparagus – Adds a fresh, healthy element.
  • White Wine – A Chardonnay or Sauvignon Blanc complements the creamy sauce beautifully.

Storage and Reheating Instructions

  • To Store – Place leftovers in an airtight container in the fridge for up to 3 days.
  • To Reheat – Warm on the stovetop over low heat, adding a splash of milk or broth to loosen the sauce.
  • Not Freezer-Friendly – The creamy sauce may separate when frozen and reheated.

Final Thoughts

Our Marry Me Shrimp Pasta is the ultimate combination of creamy, cheesy, and slightly spicy flavors that make it an unforgettable dish. Whether you’re making it for a romantic dinner, a special occasion, or just a comforting weeknight meal, this recipe is guaranteed to impress.

Easy Orange Marmalade Meatballs Recipe – Sweet & Savory Delight!

If you’re looking for the perfect appetizer or main dish that combines sweet, savory, and tangy flavors, look no further than orange marmalade meatballs. This dish is incredibly easy to prepare, bursting with bold flavors, and guaranteed to be a hit at any gathering. Whether served at a party, as a weeknight dinner, or even as a holiday treat, these sweet and savory meatballs will leave everyone wanting more.

In this guide, we will walk you through an easy orange marmalade meatballs recipe that delivers a rich, caramelized glaze with a hint of citrusy brightness. The sticky-sweet sauce pairs beautifully with the tender, juicy meatballs, making every bite irresistible. Best of all, this recipe requires minimal ingredients and can be prepared on the stovetop, in a slow cooker, or in the oven for ultimate convenience.

Why You’ll Love These Orange Marmalade Meatballs

  • Quick & Easy: Minimal prep time and simple ingredients make this recipe a breeze.
  • Perfect for Any Occasion: Whether it’s game day, a family dinner, or a potluck, these meatballs fit any event.
  • Incredible Flavor Balance: The sweetness of orange marmalade, the tanginess of barbecue sauce, and the richness of meatballs create a truly unforgettable taste.
  • Versatile Cooking Methods: Prepare these meatballs in a slow cooker, on the stovetop, or bake them for a hands-free meal.

Ingredients for the Best Orange Marmalade Meatballs

To make this dish, you’ll need just a handful of common ingredients:

For the Meatballs:

  • 1 lb ground beef (or turkey for a leaner option)
  • 1/2 cup breadcrumbs (panko or regular)
  • 1 egg (acts as a binder)
  • 1/4 cup milk (for moisture)
  • 1 teaspoon garlic powder
  • 1 teaspoon onion powder
  • 1/2 teaspoon salt
  • 1/4 teaspoon black pepper
  • 1 tablespoon Worcestershire sauce (adds depth of flavor)
  • 1 teaspoon soy sauce (for an umami boost)

For the Orange Marmalade Sauce:

  • 1 cup orange marmalade (the key ingredient for sweetness and tang)
  • 1/2 cup barbecue sauce (adds smoky depth)
  • 2 tablespoons soy sauce (balances the sweetness)
  • 1 tablespoon Dijon mustard (for a slight tang)
  • 1 tablespoon apple cider vinegar (enhances the flavors)
  • 1 teaspoon red pepper flakes (optional, for a spicy kick)
  • 1 tablespoon brown sugar (for caramelization)
  • 1/2 teaspoon garlic powder

These simple ingredients come together to create a rich, sticky glaze that perfectly coats each meatball. The orange marmalade provides a sweet citrus base, while the barbecue sauce and soy sauce add savory and smoky notes.


Step-by-Step Instructions for Orange Marmalade Meatballs

Step 1: Prepare the Meatballs

  1. Preheat your oven to 375°F (190°C) if baking, or set a pan over medium heat if cooking on the stovetop.
  2. In a large bowl, combine the ground beef, breadcrumbs, egg, milk, Worcestershire sauce, soy sauce, and seasonings.
  3. Mix everything thoroughly until well combined, but avoid overmixing, as this can make the meatballs tough.
  4. Roll the mixture into 1-inch meatballs and place them on a parchment-lined baking sheet if using the oven.

Step 2: Cook the Meatballs

  • Baking Method: Place the meatballs in the oven and bake for 18-20 minutes or until golden brown and cooked through.
  • Stovetop Method: Heat a tablespoon of oil in a pan over medium heat, then add the meatballs. Cook for 8-10 minutes, turning occasionally to brown all sides.
  • Slow Cooker Method: If using a slow cooker, lightly brown the meatballs first, then transfer them to the slow cooker.

Step 3: Make the Orange Marmalade Sauce

  1. While the meatballs are cooking, prepare the sweet and savory glaze.
  2. In a saucepan over medium heat, combine the orange marmalade, barbecue sauce, soy sauce, Dijon mustard, apple cider vinegar, brown sugar, garlic powder, and red pepper flakes.
  3. Stir well and let the sauce simmer for 5-7 minutes, allowing the flavors to meld together and the sauce to slightly thicken.

Step 4: Coat the Meatballs in Sauce

  • If using the stovetop, toss the cooked meatballs directly into the pan with the sauce and let them simmer for 5 minutes.
  • If using the oven method, transfer the meatballs into a large bowl and pour the sauce over them, tossing to coat evenly.
  • For the slow cooker method, pour the sauce over the browned meatballs and cook on low for 2-3 hours.

Step 5: Serve and Enjoy

Once the meatballs are coated in the rich, sticky sauce, transfer them to a serving platter and garnish with chopped parsley, sesame seeds, or sliced green onions for extra flair.

Serve them hot with:

  • Toothpicks for an appetizer-style presentation
  • Steamed rice or mashed potatoes for a complete meal
  • Toasted slider buns for a delicious meatball sandwich

Tips for Perfect Orange Marmalade Meatballs

  • Use high-quality orange marmalade for the best balance of sweetness and tang.
  • For extra spice, add more red pepper flakes or a dash of hot sauce.
  • Make-ahead friendly: You can prepare the meatballs and sauce in advance, then reheat when ready to serve.
  • Substitutions: Try using turkey or chicken instead of beef for a lighter option.

Variations to Try

Looking to switch things up? Here are some exciting variations to experiment with:

  • Asian-Inspired Version: Swap the barbecue sauce for hoisin sauce and add fresh ginger for a more Asian-style meatball dish.
  • Cranberry Glazed Meatballs: Substitute cranberry sauce for orange marmalade for a festive holiday twist.
  • Spicy Honey Glaze: Replace the marmalade with honey and sriracha for a bold and spicy version.

Frequently Asked Questions

Can I make these meatballs ahead of time?

Yes! You can prepare the meatballs and sauce in advance and store them separately in the fridge for up to 3 days. Simply reheat and toss them together before serving.

Can I freeze orange marmalade meatballs?

Absolutely! Store the cooked meatballs in an airtight container and freeze them for up to 3 months. When ready to eat, thaw and reheat in the sauce.

What type of barbecue sauce works best?

A smoky, slightly sweet barbecue sauce pairs best with orange marmalade. However, you can experiment with spicy or tangy versions depending on your preference.


Conclusion: A Must-Try Sweet & Savory Dish

This easy orange marmalade meatballs recipe is the perfect combination of sweet, tangy, and savory flavors, making it an excellent dish for any occasion. With minimal ingredients and simple cooking methods, you can prepare a delicious meal or appetizer that will impress family and friends.

Give this sweet and savory meatball recipe a try today, and enjoy the perfectly caramelized glaze and juicy texture in every bite!

Easy Sourdough Cheese Bread Recipe: Cheesy & Delicious!

There is something undeniably comforting about sourdough cheese bread. It combines the tangy, slightly chewy texture of homemade sourdough with the richness of gooey, melty cheese. Perfect for a snack, appetizer, or accompaniment to any meal, this easy sourdough cheese bread recipe offers all the flavors you crave with minimal effort. Whether you’re a seasoned baker or a novice, this recipe will guide you through creating a mouthwatering loaf of cheesy sourdough bread that’s sure to impress.

Why Choose Sourdough Cheese Bread?

Sourdough bread on its own is already a favorite for many, thanks to its unique flavor profile that is both tangy and earthy. The addition of cheese transforms this traditional bread into a decadent treat that balances the bread’s sour notes with the richness of melted cheese. The savory cheese embedded throughout the bread elevates each bite, making it the ideal snack or side dish for a wide range of meals.

Moreover, this bread offers incredible versatility. You can enjoy it warm, toasted, or even turned into a delicious grilled cheese sandwich. Pair it with soups, salads, or enjoy it on its own — the possibilities are endless. This sourdough cheese bread not only delivers unbeatable flavor but also a crispy crust and fluffy interior, making it a perfect addition to your bread-baking repertoire.

Essential Ingredients for Sourdough Cheese Bread

To make the best sourdough cheese bread, you’ll need a few key ingredients. These ingredients come together to create a flavorful, cheesy loaf that’s easy to bake. Here’s what you’ll need:

  • 1 cup sourdough starter (active and bubbly)
  • 1 1/2 cups warm water (about 110°F or 45°C)
  • 3 cups all-purpose flour (plus extra for dusting)
  • 1 teaspoon salt (to enhance the flavor)
  • 1 tablespoon olive oil (for added moisture and flavor)
  • 1 cup shredded cheese (Cheddar, mozzarella, or a mix of your favorites)
  • 1/4 cup grated Parmesan cheese (optional, for extra richness)
  • 1 teaspoon sugar (helps activate the yeast and balance the tanginess of the sourdough)
  • 1/2 teaspoon garlic powder (optional, for added savory flavor)

These ingredients combine to form the base for a perfectly tangy and cheesy bread. If you prefer a more intense cheese flavor, you can adjust the type of cheese you use. Cheddar, mozzarella, and even a little Gruyère or Parmesan work beautifully in this recipe.

Step-by-Step Guide to Making Sourdough Cheese Bread

Baking sourdough bread from scratch may seem like a daunting task, but this easy sourdough cheese bread recipe simplifies the process. Follow these detailed steps to create a loaf that’s soft on the inside, crispy on the outside, and packed with cheesy goodness.

Step 1: Prepare the Sourdough Starter

Before starting the recipe, make sure your sourdough starter is active and bubbly. If you don’t have a sourdough starter, you can make your own, or you can use a store-bought starter. To test if it’s ready, drop a spoonful of the starter into a glass of water; if it floats, it’s ready to use.

Step 2: Mix the Dough

In a large mixing bowl, combine the sourdough starter, warm water, flour, and sugar. Stir the mixture with a wooden spoon or dough hook until it forms a rough dough. Add the salt and olive oil to the dough, mixing until fully incorporated. The dough will be slightly sticky, but it should come together after a few minutes of mixing.

Step 3: Knead the Dough

Transfer the dough to a lightly floured surface and knead for about 8-10 minutes until it becomes smooth and elastic. If the dough is too sticky, sprinkle in a little more flour, but be careful not to add too much. You want the dough to remain slightly tacky, which will help with the chewy texture of the final bread.

Step 4: Add the Cheese

Once the dough is kneaded and smooth, flatten it slightly and sprinkle the shredded cheese evenly over the top. Fold the dough over the cheese and gently knead it until the cheese is fully incorporated into the dough. For extra cheesy goodness, you can add grated Parmesan cheese at this stage. Optionally, you can also add garlic powder or herbs for a more savory flavor.

Step 5: First Rise (Bulk Fermentation)

Place the dough in a lightly oiled bowl, covering it with a clean kitchen towel or plastic wrap. Let it rise at room temperature for about 3-4 hours, or until it has doubled in size. The time may vary depending on the warmth of your kitchen, so be patient and allow the dough to rise fully.

Step 6: Shape the Dough

Once the dough has risen, gently punch it down to release any excess air. Turn it out onto a floured surface and shape it into a round or oval loaf, depending on your preference. Transfer the shaped dough to a baking sheet lined with parchment paper or a Dutch oven if you want a more rustic, artisan-style crust.

Step 7: Second Rise (Proofing)

Cover the dough with a clean towel or plastic wrap and let it rise for an additional 1-2 hours, or until it has risen again and feels slightly puffy to the touch. This second rise helps to develop the dough’s structure and ensures that the bread will be light and fluffy.

Step 8: Preheat the Oven and Bake

Preheat your oven to 450°F (232°C) while the dough is undergoing its second rise. If you’re baking in a Dutch oven, place it in the oven while it preheats. Once the dough has finished rising, make a few shallow slashes on top of the loaf with a sharp knife or razor blade to help the bread expand while baking.

Bake the bread for 25-30 minutes until the crust is golden brown and the loaf sounds hollow when tapped on the bottom. If you want an extra crispy crust, you can add steam to the oven during the first 10 minutes of baking by placing a pan of hot water at the bottom of the oven.

Step 9: Cool and Serve

Once the bread is done baking, remove it from the oven and let it cool on a wire rack for at least 30 minutes before slicing. This allows the flavors to set, and the cheese to firm up slightly. The bread is best served warm or at room temperature, paired with your favorite meal or enjoyed on its own.

Tips for Perfect Sourdough Cheese Bread

  • Choose high-quality cheese: The type and quality of cheese you use will significantly affect the flavor of your bread. Opt for a sharp cheddar or a creamy mozzarella for the best results.
  • Don’t rush the fermentation process: Let the dough rise slowly to develop its flavor. The longer it ferments, the more tangy and complex the sourdough flavor will become.
  • Experiment with flavors: You can add herbs like rosemary, thyme, or basil for extra depth of flavor. A sprinkle of chili flakes will give the bread a subtle heat that pairs beautifully with the cheese.
  • Serve fresh or toasted: This sourdough cheese bread is excellent fresh from the oven, but it also makes a fantastic grilled cheese sandwich or can be toasted and served with soup.

Conclusion: The Ultimate Cheesy Sourdough Delight

This easy sourdough cheese bread recipe results in a loaf that’s cheesy, tangy, and absolutely delicious. With just a few simple steps, you can bake a bread that’s perfect for any occasion. Whether you enjoy it warm with butter or as a sandwich, this cheesy sourdough bread will quickly become a favorite in your baking routine.

Decadent Strawberry White Chocolate Muffins Recipe: A Heavenly Treat

When it comes to indulgent, yet simple baked goods, few treats can compare to the decadent strawberry white chocolate muffins. The sweetness of ripe strawberries combined with the rich, creamy texture of white chocolate creates a luxurious muffin experience that will leave everyone craving more. Whether you are baking for a special occasion, a weekend treat, or just because, this recipe guarantees a batch of muffins that are fluffy, moist, and utterly irresistible.

Why Choose Strawberry White Chocolate Muffins?

Muffins are a popular choice for breakfast or dessert, thanks to their convenience and versatility. However, strawberry and white chocolate muffins stand out because they strike the perfect balance of flavors. The natural tartness of the strawberries is beautifully complemented by the sweetness and smoothness of white chocolate. This combination creates a mouthwatering treat that is perfect for satisfying sweet cravings while enjoying the nutritional benefits of strawberries.

The texture of these muffins is another key feature. Light and airy on the inside with a golden, slightly crispy top, these muffins hold their shape beautifully and have the perfect crumb structure. Whether you enjoy them fresh from the oven or later as an afternoon snack, the flavor only improves with time.

Key Ingredients for Perfect Strawberry White Chocolate Muffins

To bake the best strawberry white chocolate muffins, it’s essential to use high-quality ingredients. Here is a list of the key ingredients you will need to create a batch of delicious muffins:

  • 2 cups all-purpose flour – The base of the muffins, providing structure and lightness.
  • 2 teaspoons baking powder – The leavening agent that ensures your muffins rise perfectly.
  • 1/2 teaspoon baking soda – Helps the muffins rise and provides a slight fluffiness.
  • 1/2 teaspoon salt – Balances the sweetness and enhances the flavors of the other ingredients.
  • 1/2 cup unsalted butter, melted – Provides richness and moisture to the muffins.
  • 1/2 cup granulated sugar – Adds the perfect level of sweetness to complement the strawberries.
  • 1/2 cup brown sugar – Adds a hint of caramel flavor and moisture.
  • 2 large eggs – The binding agents that provide structure and texture.
  • 1 teaspoon vanilla extract – Enhances the overall flavor, giving the muffins depth.
  • 1 cup buttermilk – Adds moisture and tanginess, making the muffins tender and light.
  • 1 cup fresh strawberries, chopped – The star ingredient that gives the muffins their fresh, fruity taste.
  • 1 cup white chocolate chips – Adds sweetness and creaminess to the muffins.

Step-by-Step Instructions for Baking Strawberry White Chocolate Muffins

Follow these detailed instructions to create the perfect strawberry white chocolate muffins. From preparing the ingredients to baking the muffins, each step is crucial to achieving the best results.

Step 1: Preheat the Oven and Prepare Muffin Tin

Start by preheating your oven to 375°F (190°C). Line a 12-cup muffin tin with paper liners or grease the cups with a little butter or non-stick spray. This will ensure your muffins bake evenly and are easy to remove after they’re done.

Step 2: Mix the Dry Ingredients

In a large bowl, whisk together the all-purpose flour, baking powder, baking soda, and salt. These ingredients should be thoroughly combined to ensure even rising and a uniform texture throughout the muffins.

Step 3: Mix the Wet Ingredients

In a separate bowl, whisk together the melted butter, granulated sugar, brown sugar, eggs, vanilla extract, and buttermilk. The butter should be melted but not hot, as this will help the sugars dissolve smoothly. Beat the mixture until it’s well combined and slightly frothy.

Step 4: Combine Wet and Dry Ingredients

Slowly pour the wet ingredients into the dry ingredients, stirring gently with a spatula or wooden spoon. Stir just until the ingredients are incorporated – be careful not to overmix, as this could lead to dense muffins. The batter should be lumpy and thick, not runny.

Step 5: Fold in the Strawberries and White Chocolate Chips

Gently fold in the chopped strawberries and white chocolate chips. Make sure they are evenly distributed throughout the batter. It’s important to handle the batter with care during this step to avoid crushing the strawberries.

Step 6: Fill the Muffin Cups

Spoon the batter into the prepared muffin tin, filling each cup about 3/4 full. This will give the muffins plenty of room to rise without overflowing. You may want to lightly press the batter down with the back of the spoon to ensure even distribution.

Step 7: Bake the Muffins

Place the muffin tin in the preheated oven and bake for 18-22 minutes, or until a toothpick inserted into the center of a muffin comes out clean. The tops should be golden brown, and the muffins should spring back when touched lightly.

Step 8: Cool and Serve

Remove the muffins from the oven and let them cool in the tin for 5 minutes. Then transfer the muffins to a wire rack to cool completely. Serve them warm or at room temperature for the best taste.

Tips for Perfect Strawberry White Chocolate Muffins

Achieving the perfect muffin requires attention to detail. Here are a few expert tips to help you make the best strawberry white chocolate muffins:

  • Use fresh, ripe strawberries: Fresh strawberries provide the best flavor and texture. Make sure to chop them into small, bite-sized pieces so they bake evenly.
  • Don’t overmix the batter: Overmixing can result in dense muffins. Mix just enough to combine the wet and dry ingredients.
  • Keep the strawberries intact: If you gently fold the strawberries into the batter rather than stirring aggressively, they’ll maintain their shape and create pockets of fresh fruit within the muffins.
  • Use high-quality white chocolate: The white chocolate chips are a key flavor component in this recipe. Choose a high-quality white chocolate for the best taste and texture.

How to Store Strawberry White Chocolate Muffins

To keep your muffins fresh, store them in an airtight container at room temperature for up to 3 days. For longer storage, you can freeze the muffins. Allow them to cool completely before placing them in a freezer-safe bag or container. When you’re ready to enjoy them, simply defrost in the microwave for a few seconds or warm them in the oven.

Creative Variations for Strawberry White Chocolate Muffins

While the classic strawberry and white chocolate combination is delicious, you can easily put your own twist on this recipe. Here are a few creative ideas:

  • Add lemon zest: A teaspoon of fresh lemon zest will complement the strawberries and bring a refreshing citrus note to the muffins.
  • Try other berries: Swap out strawberries for other berries such as blueberries or raspberries for a different fruity flavor.
  • Mix in nuts: Chopped macadamia nuts or almonds would pair wonderfully with the white chocolate and add a bit of crunch.

Conclusion: A Sweet Indulgence

Strawberry white chocolate muffins are the perfect treat for any occasion. Their combination of fresh, juicy strawberries and creamy white chocolate creates an indulgent flavor that’s hard to resist. With a tender crumb, golden top, and irresistible sweetness, these muffins will quickly become a favorite in your baking repertoire. Whether you’re enjoying them fresh out of the oven or as a delightful snack later, these muffins offer a truly satisfying experience.

Delicious Sweet Alabama Pecan Bread Recipe: A Perfect Southern Treat

When it comes to southern baking, few recipes are as beloved and enduring as the Alabama Pecan Bread. Rich, moist, and packed with the distinctive flavor of pecans, this bread captures the essence of southern hospitality and warmth. Perfect for any occasion, this bread can be served as a snack, a dessert, or even as part of a festive meal. In this guide, we will take you through the steps to make the best Alabama Pecan Bread possible, ensuring a delightful treat that will become a staple in your kitchen.

What Makes Alabama Pecan Bread So Special?

Alabama Pecan Bread is more than just a simple baked good; it’s a reflection of the rich agricultural traditions of Alabama, where pecans are grown in abundance. The inclusion of these delicious, buttery nuts in the recipe elevates the bread, creating a unique flavor and texture that’s both sweet and savory. The combination of brown sugar, vanilla, and cinnamon perfectly complements the pecans, providing an irresistible sweetness and depth.

In addition to its exceptional taste, this bread boasts a soft, tender crumb with a slightly crisp crust, making each slice a satisfying experience. Whether you enjoy it fresh out of the oven or toasted with a spread of butter, Alabama Pecan Bread is a comforting and versatile treat.

Ingredients for the Best Alabama Pecan Bread

To create this delectable bread, you’ll need to gather a few key ingredients. It’s important to use high-quality pecans and fresh ingredients to achieve the best flavor and texture. Here’s what you’ll need:

  • 2 cups all-purpose flour – The base of the bread, providing structure and lightness.
  • 1 teaspoon baking soda – This will help the bread rise and give it a nice texture.
  • ½ teaspoon salt – Balances the sweetness and enhances the flavor of the pecans.
  • 1 teaspoon ground cinnamon – Adds warmth and depth to the bread.
  • 1 cup granulated sugar – For sweetness, it works harmoniously with the other ingredients.
  • 1 cup brown sugar – Provides a rich, caramel-like sweetness that enhances the pecan flavor.
  • 2 large eggs – The binding agents that help the bread rise and give it a tender texture.
  • 1 teaspoon vanilla extract – A key flavoring that complements the pecans.
  • ½ cup buttermilk – Adds moisture and tanginess, helping the bread remain soft.
  • 1 cup pecans, chopped – The star ingredient, providing crunch and a nutty flavor.
  • 1/2 cup unsalted butter, melted – The fat that ensures the bread is rich and moist.

Step-by-Step Instructions for Perfect Alabama Pecan Bread

Now that you have all the ingredients ready, it’s time to start baking. Follow these detailed instructions to ensure your Alabama Pecan Bread turns out perfect every time.

Step 1: Prepare the Oven and Pans

Preheat your oven to 350°F (175°C). Grease and flour a 9×5-inch loaf pan, ensuring the bread will easily slide out once it’s baked.

Step 2: Mix Dry Ingredients

In a large mixing bowl, whisk together the flour, baking soda, salt, and cinnamon. This step ensures that the leavening agents and spices are evenly distributed throughout the dry ingredients.

Step 3: Cream Butter and Sugars

In another bowl, cream the melted butter with the granulated sugar and brown sugar until the mixture is light and fluffy. This process helps to incorporate air into the batter, which will give the bread a light texture.

Step 4: Add Eggs and Vanilla

Add the eggs one at a time, mixing well after each addition. Stir in the vanilla extract, which will add a fragrant and complementary flavor to the bread.

Step 5: Combine Wet and Dry Ingredients

Alternate adding the dry ingredient mixture and the buttermilk into the wet ingredients, beginning and ending with the dry ingredients. Mix gently, just until combined. Be careful not to overmix the batter, as this can result in dense bread.

Step 6: Fold in Pecans

Gently fold in the chopped pecans, making sure they are evenly distributed throughout the batter. The pecans should be coated in the batter to ensure they don’t sink to the bottom during baking.

Step 7: Bake the Bread

Pour the batter into the prepared loaf pan and smooth the top with a spatula. Place the pan in the preheated oven and bake for 60-70 minutes, or until a toothpick inserted into the center comes out clean. If the top of the bread is browning too quickly, you can cover it with aluminum foil during the last 15 minutes of baking.

Step 8: Cool and Serve

Once the bread is done, remove it from the oven and let it cool in the pan for about 10 minutes. Afterward, transfer it to a wire rack to cool completely. Slice and serve as desired.

Tips for the Perfect Alabama Pecan Bread

To make sure your Alabama Pecan Bread turns out perfectly, here are some helpful tips:

  • Toast the pecans: For an even richer flavor, consider toasting the chopped pecans in a dry skillet over medium heat for a few minutes before adding them to the batter. This step enhances the nutty flavor and gives the bread an extra depth of taste.
  • Don’t overmix: Overmixing the batter can result in tough bread. Stir the ingredients together just until they are combined for a light, airy texture.
  • Let the bread cool: Allow the bread to cool before slicing to avoid it becoming too crumbly. The flavors also develop better once it has cooled.
  • Customize with add-ins: Feel free to experiment by adding chocolate chips, dried fruit, or even a swirl of cream cheese for an added twist on the traditional recipe.

Serving Suggestions

Alabama Pecan Bread is incredibly versatile and can be enjoyed in many ways:

  • For breakfast: Serve a warm slice with a pat of butter or your favorite jam.
  • As a dessert: Pair it with a scoop of vanilla ice cream for a decadent treat.
  • For snacking: Enjoy it as a sweet, satisfying snack throughout the day.
  • As a gift: Wrap the bread in parchment paper and tie it with a ribbon for a thoughtful homemade gift.

Conclusion: The Ultimate Southern Comfort Food

Alabama Pecan Bread is the perfect example of southern hospitality at its finest. With its deliciously sweet and nutty flavor, it’s sure to become a favorite in your baking repertoire. Whether you’re enjoying it with family and friends or giving it as a thoughtful gift, this bread brings warmth and comfort to every occasion.

Decadent Hot Fudge Brownie Bread Recipe

If you are looking for the ultimate chocolate dessert, this Decadent Hot Fudge Brownie Bread is the perfect indulgence. This rich, moist, and fudgy bread combines the best of brownies and bread, making it an irresistible treat for any occasion. Whether you enjoy it warm with a scoop of ice cream or as a snack with a cup of coffee, this recipe will satisfy all your chocolate cravings.

Why You Will Love This Recipe

  • Rich and fudgy texture – Every bite is packed with gooey chocolate goodness.
  • Easy to make – Simple ingredients and quick preparation.
  • Perfect for any occasion – Serve it as a dessert, breakfast, or snack.
  • Customizable – Add nuts, chocolate chips, or caramel for extra flavor.

Ingredients

For the Brownie Bread:

  • 1 cup unsalted butter, melted
  • 1 cup granulated sugar
  • 1 cup brown sugar
  • 4 large eggs
  • 2 teaspoons vanilla extract
  • 1 cup all-purpose flour
  • 3/4 cup unsweetened cocoa powder
  • 1 teaspoon baking powder
  • 1/2 teaspoon salt
  • 1/2 cup semi-sweet chocolate chips
  • 1/2 cup chopped walnuts (optional)

For the Hot Fudge Sauce:

  • 1/2 cup heavy cream
  • 1/2 cup dark chocolate chips
  • 1/4 cup unsalted butter
  • 1/4 cup light corn syrup
  • 1 teaspoon vanilla extract

Instructions

Step 1: Preheat and Prepare the Pan

Preheat your oven to 350°F (175°C). Grease and line a 9×5-inch loaf pan with parchment paper for easy removal.

Step 2: Mix the Wet Ingredients

In a large mixing bowl, whisk together melted butter, granulated sugar, and brown sugar until smooth. Add eggs one at a time, mixing well after each addition. Stir in vanilla extract.

Step 3: Combine the Dry Ingredients

In another bowl, sift together flour, cocoa powder, baking powder, and salt. Gradually add the dry ingredients to the wet ingredients, stirring until just combined. Be careful not to overmix.

Step 4: Add Chocolate and Nuts

Fold in chocolate chips and walnuts (if using). This step enhances the texture and adds an extra layer of decadence.

Step 5: Bake the Brownie Bread

Pour the batter into the prepared loaf pan. Bake for 50-60 minutes, or until a toothpick inserted in the center comes out with a few moist crumbs. Let the bread cool in the pan for 10 minutes before transferring it to a wire rack.

Step 6: Prepare the Hot Fudge Sauce

While the brownie bread is cooling, make the hot fudge sauce. In a small saucepan, heat heavy cream and butter over medium heat until the butter melts. Remove from heat and stir in chocolate chips, corn syrup, and vanilla extract until smooth.

Step 7: Serve and Enjoy

Drizzle the warm hot fudge sauce over slices of brownie bread. Serve immediately for a melt-in-your-mouth experience. Pair it with a scoop of vanilla ice cream or a dollop of whipped cream for an extra treat.

Tips for the Best Brownie Bread

  • Use high-quality chocolate – This enhances the richness of the bread.
  • Do not overmix the batter – Overmixing can make the bread dense.
  • Let it cool before slicing – This helps the bread set properly.
  • Store properly – Keep it in an airtight container at room temperature for up to 3 days or refrigerate for a week.
  • Reheat for extra gooeyness – Microwave a slice for 15-20 seconds before serving.

Variations and Add-Ins

  • Nutty Delight: Add pecans, almonds, or hazelnuts for extra crunch.
  • Caramel Drizzle: Drizzle with salted caramel sauce for a sweet-salty contrast.
  • Spiced Brownie Bread: Add cinnamon or espresso powder for depth of flavor.
  • Marble Effect: Swirl in some cream cheese for a cheesecake-like twist.

Frequently Asked Questions

Can I use Dutch-processed cocoa instead of natural cocoa?

Yes! Dutch-processed cocoa will give the bread a smoother, richer chocolate flavor.

Can I make this gluten-free?

Absolutely! Substitute the all-purpose flour with a gluten-free 1:1 baking flour.

Can I freeze brownie bread?

Yes. Wrap it tightly in plastic wrap and store it in an airtight container. Freeze for up to 3 months.

What can I substitute for eggs?

Use flax eggs (1 tbsp flaxseed meal + 3 tbsp water per egg) or applesauce as a vegan alternative.

Final Thoughts

This Decadent Hot Fudge Brownie Bread is a show-stopping dessert that combines the best parts of brownies and bread into one irresistible treat. With its rich chocolate flavor, fudgy texture, and gooey hot fudge drizzle, it is sure to impress family and friends. Try this recipe today and indulge in the ultimate chocolate experience!

Decadent Red Velvet Pancakes Recipe for a Sweet Breakfast Treat

Indulge in a deliciously rich and fluffy breakfast with our Decadent Red Velvet Pancakes. Perfect for special occasions, weekend brunches, or simply treating yourself, these pancakes offer a delightful balance of cocoa-infused sweetness and tangy cream cheese topping. Made with simple ingredients and easy-to-follow steps, this recipe will elevate your morning meal into a gourmet experience.

Why You’ll Love These Red Velvet Pancakes

  • Soft, fluffy texture with a rich red velvet flavor.
  • Perfectly balanced cocoa and vanilla taste.
  • Pairs beautifully with cream cheese frosting.
  • Easy to make for special breakfasts or brunch.
  • A beautiful presentation for holidays and celebrations.

Ingredients for Red Velvet Pancakes

Dry Ingredients:

  • 1 ½ cups all-purpose flour
  • 2 tablespoons unsweetened cocoa powder
  • 2 tablespoons granulated sugar
  • 1 teaspoon baking powder
  • ½ teaspoon baking soda
  • ¼ teaspoon salt

Wet Ingredients:

  • 1 cup buttermilk
  • 2 large eggs
  • 2 tablespoons unsalted butter (melted)
  • 1 teaspoon vanilla extract
  • 1 tablespoon red food coloring

For the Cream Cheese Drizzle:

  • 4 oz cream cheese (softened)
  • ¼ cup powdered sugar
  • ½ teaspoon vanilla extract
  • 2–3 tablespoons milk (to adjust consistency)

Step-by-Step Instructions

1. Prepare the Pancake Batter

  1. In a large mixing bowl, whisk together flour, cocoa powder, sugar, baking powder, baking soda, and salt.
  2. In a separate bowl, beat buttermilk, eggs, melted butter, vanilla extract, and red food coloring until well combined.
  3. Gradually add the wet ingredients to the dry ingredients, stirring gently until just combined. Do not overmix, as this will make the pancakes dense.
  4. Let the batter rest for 5 minutes while you heat the pan.

2. Cook the Pancakes

  1. Heat a non-stick skillet or griddle over medium heat and lightly grease it with butter or cooking spray.
  2. Pour ¼ cup of batter onto the pan for each pancake.
  3. Cook until bubbles form on the surface and the edges begin to set (about 2 minutes).
  4. Flip carefully and cook for another 1-2 minutes until fully cooked.
  5. Transfer pancakes to a plate and cover with a kitchen towel to keep warm while cooking the remaining batter.

3. Make the Cream Cheese Drizzle

  1. In a mixing bowl, beat cream cheese, powdered sugar, and vanilla extract until smooth.
  2. Gradually add milk, one tablespoon at a time, until the desired consistency is reached.
  3. Drizzle over warm pancakes or serve on the side.

Topping Ideas for Red Velvet Pancakes

Enhance the flavor and presentation of your pancakes with these delicious toppings:

  • Fresh Berries: Strawberries, raspberries, or blueberries add a refreshing contrast.
  • Chocolate Chips: Sprinkle some on top for an extra chocolatey bite.
  • Whipped Cream: A light and airy addition to balance the richness.
  • Maple Syrup: Classic and always delicious.
  • Chopped Nuts: Adds a slight crunch and nutty flavor.
  • Dusting of Cocoa Powder: Enhances the red velvet essence.

Tips for the Best Red Velvet Pancakes

  • Use Buttermilk: It adds tenderness and enhances the flavor.
  • Do Not Overmix the Batter: This keeps the pancakes light and fluffy.
  • Cook on Medium Heat: Prevents burning while allowing even cooking.
  • Keep Pancakes Warm: Place them in a warm oven (200°F) while cooking the rest.
  • Make the Cream Cheese Drizzle Ahead: Store it in the fridge and warm slightly before serving.

Serving Suggestions

These red velvet pancakes are ideal for:

  • Valentine’s Day Breakfast – Impress your loved one with a romantic treat.
  • Christmas Morning Brunch – The festive red color fits the holiday spirit.
  • Birthday Breakfast Surprise – Add candles for a fun start to the day.
  • Weekend Indulgence – Enjoy a luxurious morning meal with family.

Frequently Asked Questions

1. Can I Make These Pancakes Without Buttermilk?

Yes! Substitute buttermilk with 1 cup of milk + 1 tablespoon of lemon juice or vinegar. Let it sit for 5 minutes before using.

2. Can I Make Them Ahead of Time?

Absolutely. Store cooked pancakes in an airtight container in the fridge for up to 3 days. Reheat in a skillet or microwave before serving.

3. Can I Freeze Red Velvet Pancakes?

Yes! Stack pancakes with parchment paper between them and freeze in a sealed bag for up to 2 months. Reheat in a toaster or oven.

4. Can I Make These Gluten-Free?

Yes, substitute the all-purpose flour with a gluten-free flour blend that contains xanthan gum.

5. What Can I Use Instead of Red Food Coloring?

For a natural alternative, use beet powder or pomegranate juice.

Final Thoughts

These Decadent Red Velvet Pancakes are a show-stopping, delicious, and easy-to-make breakfast treat that will impress anyone at the table. With their rich cocoa flavor, fluffy texture, and luscious cream cheese drizzle, they make every morning feel like a special occasion. Try them out and elevate your brunch game!

Healthy & Easy Overnight Oats with Fruit Recipes

A nutritious and convenient breakfast, overnight oats offer a delicious, no-cook option packed with fiber, protein, and essential vitamins. By preparing them the night before, we save time in the morning while ensuring a healthy and energizing start to the day. These recipes are versatile, allowing us to customize them with various fruits, nuts, seeds, and sweeteners.

Why Choose Overnight Oats?

  • Time-Saving: Perfect for busy mornings.
  • Nutrient-Rich: High in fiber, protein, and antioxidants.
  • Customizable: Endless variations to suit different tastes and dietary needs.
  • No Cooking Required: Just mix ingredients, refrigerate, and enjoy.
  • Supports Digestion: The soaking process helps break down phytic acid, making nutrients more bioavailable.

Basic Overnight Oats Recipe

Ingredients:

  • ½ cup rolled oats
  • ½ cup milk (dairy or plant-based)
  • ¼ cup yogurt (optional, for creaminess and probiotics)
  • 1 tablespoon chia seeds or flaxseeds
  • 1 teaspoon honey or maple syrup (optional)
  • ½ teaspoon vanilla extract
  • ¼ teaspoon cinnamon (optional for extra flavor)
  • ½ cup fruit of choice (berries, banana, apple, etc.)

Instructions:

  1. In a jar or airtight container, combine oats, milk, yogurt, chia seeds, sweetener, vanilla, and cinnamon.
  2. Stir well to ensure everything is evenly mixed.
  3. Add fruit on top or mix it in.
  4. Cover and refrigerate overnight (at least 6 hours).
  5. Stir before serving and enjoy cold or slightly warmed.

Top 5 Delicious Overnight Oats Variations

1. Berry Blast Overnight Oats

  • ½ cup rolled oats
  • ½ cup almond milk
  • ¼ cup Greek yogurt
  • 1 tablespoon chia seeds
  • 1 teaspoon honey
  • ½ cup mixed berries (strawberries, blueberries, raspberries)

This antioxidant-rich recipe provides a refreshing and nutrient-dense breakfast with natural sweetness and fiber.

2. Banana Nut Overnight Oats

  • ½ cup oats
  • ½ cup oat milk
  • 1 mashed banana
  • 1 tablespoon peanut butter
  • ½ teaspoon cinnamon
  • 1 tablespoon chopped walnuts

This protein-packed version supports muscle recovery and provides a sustained energy boost.

3. Apple Cinnamon Overnight Oats

  • ½ cup oats
  • ½ cup almond milk
  • ½ cup diced apple
  • ½ teaspoon cinnamon
  • 1 tablespoon chopped almonds
  • 1 teaspoon maple syrup

A comforting and fiber-rich breakfast, perfect for fall mornings.

4. Chocolate Banana Overnight Oats

  • ½ cup oats
  • ½ cup coconut milk
  • 1 tablespoon cocoa powder
  • 1 mashed banana
  • 1 teaspoon honey
  • 1 tablespoon dark chocolate chips

A dessert-like yet healthy breakfast rich in antioxidants and potassium.

5. Tropical Mango Coconut Overnight Oats

  • ½ cup oats
  • ½ cup coconut milk
  • ½ cup diced mango
  • 1 tablespoon shredded coconut
  • 1 teaspoon chia seeds
  • 1 teaspoon honey

A creamy and refreshing option packed with tropical flavors and healthy fats.

Health Benefits of Overnight Oats

1. High in Fiber and Supports Digestion

Oats are an excellent source of soluble fiber, which promotes digestion and keeps us full longer.

2. Rich in Protein and Healthy Fats

Adding chia seeds, nuts, and yogurt enhances protein intake, supporting muscle recovery and energy levels.

3. Helps Regulate Blood Sugar

The complex carbohydrates in oats provide a slow release of energy, preventing sugar spikes.

4. Supports Heart Health

Oats contain beta-glucan, a fiber known to reduce cholesterol levels and promote heart health.

Tips for the Best Overnight Oats

  • Use Rolled Oats – Avoid instant oats, as they become too mushy.
  • Adjust Liquid Ratio – For thicker oats, reduce milk slightly; for a thinner consistency, add more.
  • Sweeten Naturally – Use honey, maple syrup, or mashed fruit instead of refined sugar.
  • Try Different Milks – Almond, oat, coconut, or dairy milk can change the flavor profile.
  • Experiment with Toppings – Add granola, seeds, coconut flakes, or nut butter for extra texture.

Storage and Meal Prep Tips

  • Refrigeration: Overnight oats last up to 5 days when stored in airtight containers.
  • Meal Prep-Friendly: Prepare multiple jars at once for a week’s worth of breakfasts.
  • On-the-Go: Use a mason jar with a lid for easy transport.

Common Questions About Overnight Oats

1. Can I Use Steel-Cut Oats Instead of Rolled Oats?

Yes, but they require a longer soaking time (at least 10-12 hours) and extra liquid.

2. Can I Eat Overnight Oats Warm?

Absolutely! Heat them in the microwave for 30-60 seconds if you prefer a warm breakfast.

3. Can I Make Overnight Oats Without Chia Seeds?

Yes! While chia seeds add texture and nutrition, they are optional. You can replace them with flaxseeds or omit them entirely.

4. Can I Freeze Overnight Oats?

Yes, but the texture may change. Freeze in airtight containers and thaw in the refrigerator overnight before eating.

Final Thoughts

Overnight oats are a game-changer for those looking for a healthy, delicious, and effortless breakfast. With endless possibilities, we can enjoy a different variation every day of the week while reaping numerous health benefits.

Start incorporating these healthy overnight oats recipes into your routine and enjoy a nutrient-packed, satisfying meal that supports your overall well-being.